Plaza / Official / B0067
Creative Slide Ramp Tower

OfficialB0067QUADRO website: From 18 mo

Creative Slide Ramp Tower

QUADRO
QUADROOfficial

This official model takes 188 parts, covers 254 × 125 cm, stands 177 cm tall and goes together in 36 steps. The full parts list, step-by-step instructions and the sets that build it are below.

Footprint
254 × 125 cm (3.2 ㎡)
Height
177 cm
Climbable height
61 cm
Parts
188
Manual steps
36

A factory model, not a recommendation. Judge height, span and rails for your home.
Parts list for Creative Slide Ramp Tower

PartCodeQty
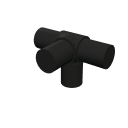
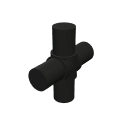
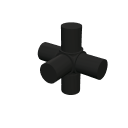
Space 5-wayCS53
Space 4-wayCS414
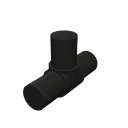
Surface 4-wayCF42
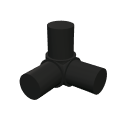
Space 3-wayCS320
Surface 3-wayCF310
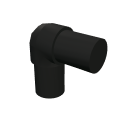
ElbowCS218
StraightCF22
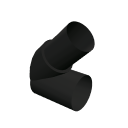
45°C454
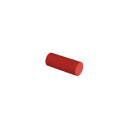
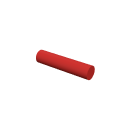
Tube 15 cmT156
Tube 35 cmT3599
Panel 40×40 cmPA48
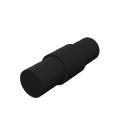
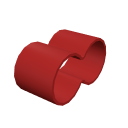
Double-tubeCDT2
Total188

Step-by-step instructions: 36 steps

Build from the bottom up, level by level: first the connectors and tubes of a level, then the uprights to the next one, and panels and fabric once the frame stands. Follow along in 3D →

  1. Step 1 · Level 1: connectors and tubes on the floorSpace 3-way× 2Tube 35 cm× 1
  2. Step 2 · Uprights up to level 2Tube 35 cm× 4
  3. Step 3 · Level 2: connectors and tubes 1 cm upSpace 4-way× 2Space 3-way× 9Surface 3-way× 1Elbow× 3Tube 35 cm× 16
  4. Step 4 · Uprights up to level 3Tube 15 cm× 2Tube 35 cm× 10
  5. Step 5 · Level 3: connectors and tubes 3 cm upElbow× 2Tube 35 cm× 1
  6. Step 6 · Uprights up to level 4Tube 15 cm× 2
  7. Step 7 · Level 4: connectors and tubes 20 cm upSpace 4-way× 2Tube 35 cm× 1
  8. Step 8 · Uprights up to level 5Tube 35 cm× 2
  9. Step 9 · Level 5: connectors and tubes 21 cm upSurface 3-way× 2Tube 35 cm× 1
  10. Step 10 · Uprights up to level 6Tube 35 cm× 2
  11. Step 11 · Level 6: connectors and tubes 34 cm upElbow× 2
  12. Step 12 · Uprights up to level 7Tube 35 cm× 2
  13. Step 13 · Level 7: connectors and tubes 41 cm upSpace 5-way× 3Space 4-way× 6Space 3-way× 2Surface 3-way× 1Tube 35 cm× 13
  14. Step 14 · Uprights up to level 8Tube 15 cm× 2Tube 35 cm× 8
  15. Step 15 · Level 8: connectors and tubes 55 cm upStraight× 2
  16. Step 16 · Uprights up to level 9Tube 35 cm× 2
  17. Step 17 · Level 9: connectors and tubes 61 cm upSpace 4-way× 4Space 3-way× 2Tube 35 cm× 5
  18. Step 18 · Uprights up to level 10Tube 35 cm× 6
  19. Step 19 · Level 10: connectors and tubes 75 cm upSurface 3-way× 2
  20. Step 20 · Uprights up to level 11Tube 35 cm× 2
  21. Step 21 · Level 11: connectors and tubes 81 cm upElbow× 4Tube 35 cm× 2
  22. Step 22 · Level 12: connectors and tubes 96 cm upSurface 3-way× 2
  23. Step 23 · Uprights up to level 13Tube 35 cm× 2
  24. Step 24 · Level 13: connectors and tubes 101 cm upSurface 4-way× 2Surface 3-way× 2Elbow× 2Tube 35 cm× 4
  25. Step 25 · Uprights up to level 14Tube 35 cm× 6
  26. Step 26 · Level 14: connectors and tubes 130 cm upSpace 3-way× 1Elbow× 1Tube 35 cm× 1
  27. Step 27 · Uprights up to level 15Tube 35 cm× 1
  28. Step 28 · Level 15: connectors and tubes 141 cm upSpace 3-way× 2Elbow× 4Tube 35 cm× 2
  29. Step 29 · Level 16: connectors and tubes 144 cm up45°× 4
  30. Step 30 · Uprights up to level 17Tube 35 cm× 4
  31. Step 31 · Level 18: connectors and tubes 172 cm upSpace 3-way× 2Tube 35 cm× 1
  32. Step 32 · Level 4: panels and fabricPanel 40×40 cm× 1
  33. Step 33 · Level 7: panels and fabricPanel 40×40 cm× 3
  34. Step 34 · Level 9: panels and fabricPanel 40×40 cm× 2
  35. Step 35 · Level 11: panels and fabricPanel 40×40 cm× 2
  36. Step 36 · Finishing: fit the remaining connectors and tube coresDouble-tube× 2

Which set builds it

No single QUADRO set is enough on its own.

Within 8 extra parts:

All setsIdeas by age and spaceParts guideAll official models